I’ll turn the toggle off. That’ll boost performance, right?
A couple of weeks ago, mid BMCS rebuild, I switched off a toggle in JetEngine. One toggle. The description next to it was ambiguous enough that I read it the wrong way round — I thought I was disabling something I didn’t need, and instead I’d switched off the setting that meant Elementor content did not render at all. Without realising until later in the day, half my page content had vanished. I then spent the best part of an hour convinced I’d broken something in a template file, checking recent code changes, before I eventually worked back to that one setting and realised what I’d actually done.
Nothing was lost. Nothing was even that serious, in the end. But it’s exactly the kind of thing that can happen when a setting gets changed mid-build without a proper test straight afterwards — and because it happened, it served as a good reminder as to why I try to remain fairly rigid about my WordPress setup habits before I let myself get on with the interesting parts of a build.
Why mid-build changes are riskier than you think…
The JetEngine toggle is a small example of a bigger pattern: plugin settings, especially on anything foundational — page builders, custom field setup, caching — don’t always fail loudly. Sometimes they fail by simply not rendering something, or rendering it differently, and the cause isn’t obvious unless you’ve just changed the one thing responsible. The lesson isn’t “don’t touch settings” — you obviously have to configure things as you go. It’s that every settings change on core, structural plugins deserves an immediate check afterwards, before you move on to the next task and lose the thread of what you just changed.
It’s also a reminder to not always trust a setting’s description at face value if the wording is even slightly ambiguous. So now, if I’m not sure what a toggle or ticked checkbox actually does, I test it in isolation rather than assume, especially early in a build when there’s less content around to notice something’s gone missing.
Another recent example, just to hightlight the importance of testing changes, I updated my parent Astra theme and thought nothing of it – I’ve used Astra for years without ever really having an issue. A couple of hours go by, with a number of changes made to the site and without warning my custom css is no longer working – elements not rendering properly or styled with default css. I spent a good few hours troubleshooting and getting nowhere until I noticed another Astra update was available fixing the issue – the one place I did not think to look was the root of the problem. Again, the message is always check your site after ANY update.
The WordPress setup routine that works for me…
Staging, backups, and knowing which workflow you’re actually running
First question is what kind of build this is, and for this there isn’t one universal rule — there are too many ways to approach it, but this is my current default:
- New build: I create the site on a blank subdomain from the start, and from a fresh WordPress install I build it there in full, only copying it across to the live domain once it’s ready. The live domain stays untouched — with the usual exception of a “Coming Soon” page — until there’s something worth showing.
- Revision to an existing live site: For anything major, I’ll run it through a proper staging environment first, test it there, then push the change live. For smaller or lower-risk changes, I might copy the live site to staging purely to have a safe testing platform, without necessarily intending a full staging to live migration for that specific change.
The reason I mention this at all is having been caught out once by setting up a site in a poorly positioned sub-folder (to be fair, I’ve got it wrong a few times over the years). What should have been a five-minute job to migrate ended up being a half-day exercise exporting and importing large database files, waiting for slow server transfers and then reconfiguring it all. Build in the right place from the start and a migration stays straightforward.
Database security — renaming the table prefix, every time
I currently run every new build through Hostinger’s auto-installer (far easier but not as satisfying as doing it manually), which sets up WordPress with the database default wp_ table prefix (if there’s a way to change this at the point of the full install, I haven’t found it yet). Before I add any real content, I go in and rename the tables — I follow this process for updating the prefix consistently across the database and wp-config.php.
It’s a small step, but the default prefix is one of the more predictable things automated attack scripts look for, and there’s no real downside to changing it early — it’s far more fiddly to do once a site has real data and active plugins relying on the existing table names. I treat it as part of the same setup pass as the JetEngine lesson above: get the structural, hard-to-undo decisions right before there’s content sitting on top of them. I’ve had far too many experiences of what happens when that groundwork gets skipped — but the short version is it’s a lot easier to prevent than to clean up after.
Choose and install my theme
Themes will vary from project to project, depending on what you’re aiming to build. I tend to stick with themes I know and trust, and I’ll always make sure I’ve set up and activated a child theme before I start any real work on a site. No matter which theme you use, there will be a design tweak or a piece of custom code you need to add sooner or later, and one of the safest, most reliable ways to do that is through the child theme rather than the parent.
(More on why I never skip this step in a dedicated child themes article, coming soon.)
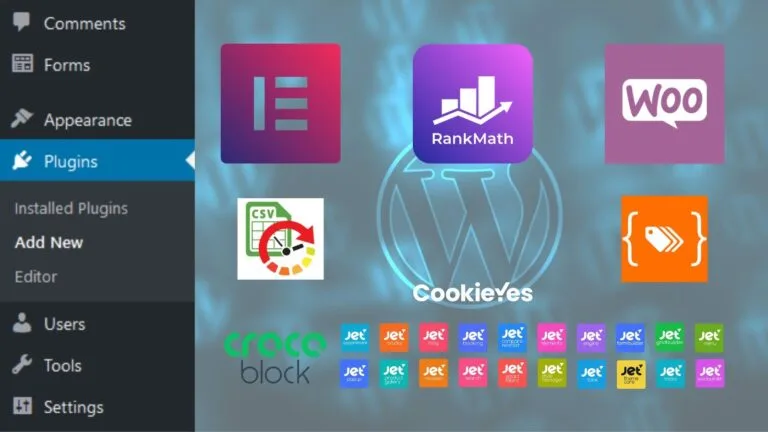
Choose and install my plugins
The number and type of plugins you need is entirely dependent on the functionality your project requires. My general advice is to stick with the ones you already know will do the job. If there’s a new, shiny, singing-and-dancing plugin catching your eye, test it on a playground site first — don’t install it straight onto a live build and hope for the best. Deactivating and deleting a plugin once you’ve realised it isn’t the right tool isn’t always as simple as it seems.
I have a core set of plugins that tend to earn their place on most sites I build, so those go in as standard. If I know I need additional functionality beyond that, I’ll weigh up building it myself against researching and testing a suitable plugin — always checking whether it plays nicely with everything else already installed, which isn’t guaranteed.
Customise the basics
Depending on your theme and build tools (Gutenberg, Elementor, Bricks, etc.), this is where I update all the base design features: brand colours, typography (reviewing font setup — Google, licensed, or locally hosted), page and container widths, responsive breakpoints, and set up my CSS framework and variables. Anything that counts as “go-to functionality” but isn’t already covered by my plugin suite gets added here too.
Add plugin data — but know what to hold back
Once the basics are in place, I start adding real plugin data and initial content where it makes sense. But not everything goes in at this stage. Some things are deliberately left until closer to launch:
- Cookie consent management — no point prompting visitors for consent on a site that isn’t public yet
- Analytics (Google Analytics, etc.) — build-phase traffic isn’t real traffic, and I don’t want it skewing the data I’ll actually rely on later
- Caching — turning this on too early can mask genuine issues while I’m still actively making changes, making problems harder to spot and easier to blame on the wrong thing
The common thread through all of this isn’t a rigid, unchangeable process — it’s about deciding the structure and the safety net before making major changes, not partway through when something’s already gone wrong.
Why does this matter to me…
Nearly everything I write about the actual build — code snippets, performance tweaks, scripts that load conditionally depending on the page — assumes this groundwork is already in place. A good, recent example is script-enqueuing: none of those conditional-loading decisions matter much if the underlying site structure and settings weren’t solid to begin with.
Getting your WordPress setup right isn’t the exciting part of a build, but it’s the part that quietly determines how much time you spend firefighting later. This is not a pre-requisite that has to be followed, but I’d certainly recommend tailoring a similar process that fits the way you work and the tools you work with.
My simple WordPress setup checklist…
[ _ ] Decide the staging/backup approach for the specific build before starting
[ _ ] Install WordPress on a subdomain (or locally, if you prefer)
[ _ ] Rename the database table prefix away from the wp_ default
[ _ ] Install and activate a child theme
[ _ ] Install core plugins and confirm structural settings (page builder, custom fields, eCommerce) immediately after any change, not “later”
[ _ ] Add base customisations — colours, typography, widths, breakpoints, CSS variables
[ _ ] Note which plugins/data to hold back until closer to launch (cookie manager, analytics, caching)